Thousand Oaks vs. Baader Planetarium Solar Filter Films

With all the buzz about the eclipse going on I thought about revisiting the topic of solar filters. I’d previously imaged the sun very precariously using regular ND filters (10-stop, or stacked 10-stop + 6-stop) but this is inadvisable as they’re not rated for this use. I did this by shielding the entire aperture with a piece of cardboard between photos and manually jerking it out of the way just in time for each photo (based on my intervalometer’s pre-photo beeps). This was years ago and near as I can tell there was no damage to my equipment but it was still a bad idea in hindsight. I was perhaps lucky; not all conditions and filters are the same, and damage to your focusing screen, sensor, and even eyes could result (it’s largely about the parts of the EM spectrum you can’t see).

Considering instead filters meant specifically for solar photography using a camera with a super-telephoto lens, you essentially have two options — screw-on glass solar filters, and solar filter film. I haven’t experimented with the former, this post is specifically about the latter.

Two common solar filter films I saw suggested on astronomy discussion forums are sold by Thousand Oaks (TO) and Baader Planetarium (BP) and I ended up doing a side-by-side comparison.

My first purchase was a 6x6” square of Thousand Oaks film on Amazon. The Amazon listing is a little ambiguous about which of their films you’re buying, I believe I received what they call their “Silver-Black Polymer Sheets.”

For comparison, I ordered (also on Amazon) the Baader Planetarium “AstroSolar Safety Film 5.0.”

As they’re intended for use on any aperture size, both of these products require you to construct your own filter holders. There are myriad instructions online for how to do this so I’ll omit providing any of my own here. I made holders for both films using Planters 10oz peanut cans with the bottoms removed, a hot glue gun, and a lot of tape. It turned out that with a little effort the inside of the Planters cans fit nicely around the extended hood of the Canon 400mm f/5.6L USM I picked up used (see previous post). I will say that the TO film is much more sturdy, I felt less nervous building the TO film filter holder vs. the BP, which felt like handling gold leaf by comparison.

Here’s a side by side comparison of solar images through the TO and BP filter materials (TO on the left, BP on the right):

fog_before fog_after

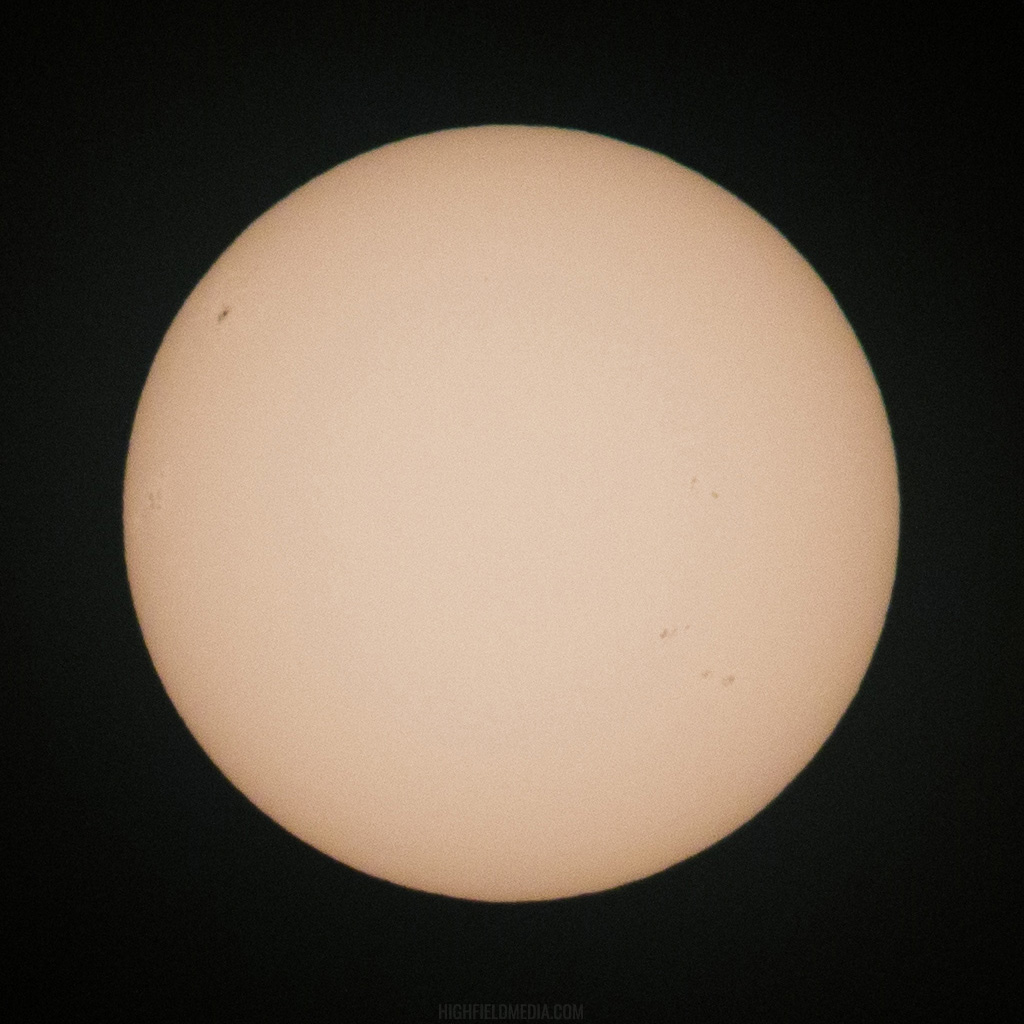
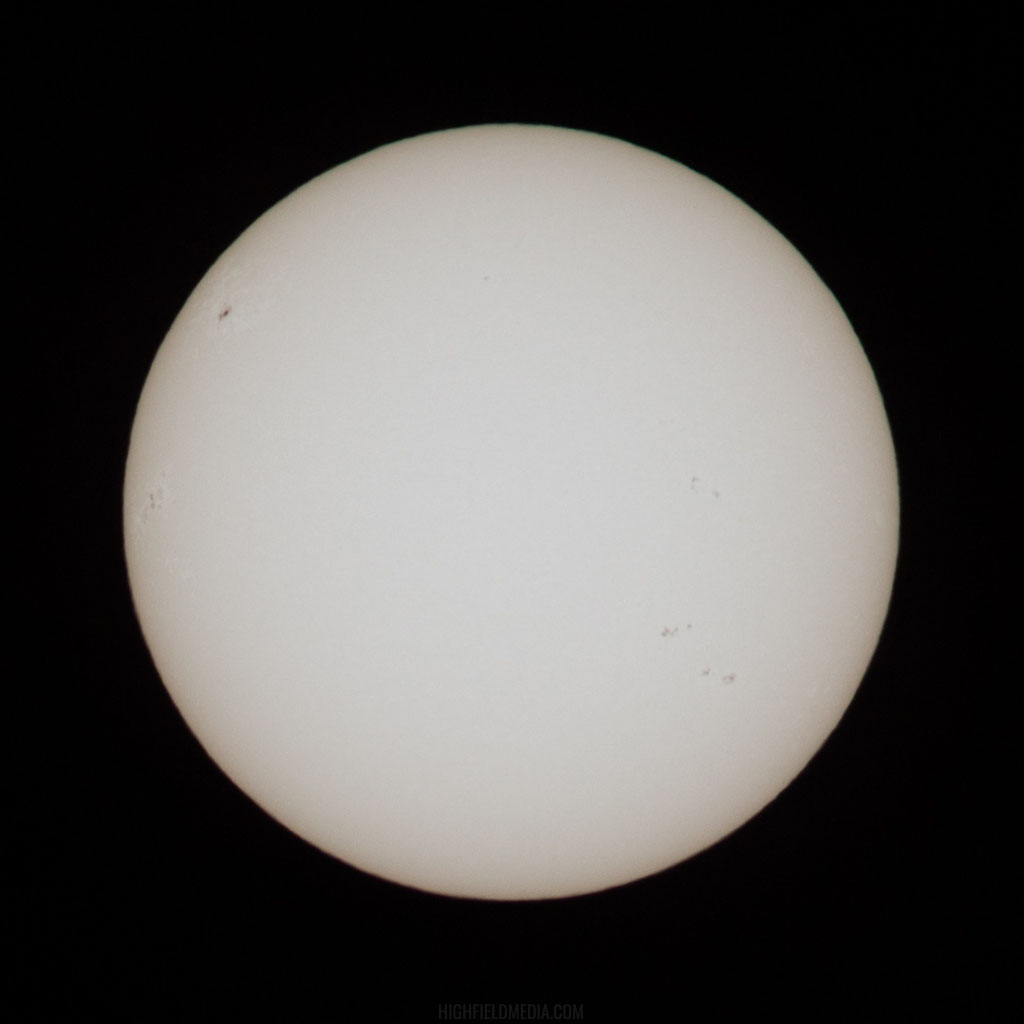
The above photos are 1024x1024 full-resolution crops from a Canon 6D using the Canon 400mm f/5.6L USM with a Canon 1.4x teleconverter (original version, quite old). In each the sun was about half-way between center and the top of the frame (the sun moves quite fast when you’re futzing around with settings at 560mm equivalent focal length). I also rotated the BP image to align with the TO image, as the sun’s movement between filter swaps resulted in a small line-of-sight rotation relative to my pan/tilt mount (this reduces the BP image sharpness slightly).

The teleconverter undoubtedly reduces the sharpness some also, and I’m not sure if there’s a clear difference in terms of optical clarity between the two filter materials. However, the BP filter lets through way more light, so the ISO ends up being lower, hence the much higher relative amount of noise in the TO image, and better definition of the sunspot detail using the BP film. My initial interest in the BP film was after seeing a blog post somewhere else that compared the two films and showed a much sharper image with the BP film. In hindsight, I suspect that poster may have had the same challenge I did — difficulty focusing through high-ISO noise on Live View. I may have better luck running the camera tethered and using the EOS app to adjust focus, I’m not currently set up for that though, so TBD I guess. In-camera settings for each, to give you an idea about the difference in light transmission:

  • TO: f/8.0, 1/800s, ISO1600

  • BP: f/8.0, 1/1600s, ISO100

Doing the math (and excluding my LR adjustments), there’s about a 5-stop difference which is more than I would have expected. Also, the TO filter (as advertised) produced a really strong orange tint, which is maybe what you expect thinking about the sun as a cartoonish yellow orb in the sky, whereas the BP provided a nearly perfectly white image of the sun. I used the white balance eyedropper in Lightroom to bring the TO closer to white, for the side-by-side comparison, but I made no additional effort to match the white balance.

I’ve included a gallery at the bottom of this post showing the “As-Shot” and edited Lightroom settings I used for each. I didn’t think too hard about this for the editing, just played around to get some extra contrast in the sunspots. Note that some of the LR screenshots shows f/5.6; this is because I have several of the pins taped off in the teleconverter so I can still use autofocus with this slow lens. I’m shooting wide-open through the teleconverter which gives me an f/8 equivalent aperture for both photos. Also keep in mind that the “As Shot” white balance values are just what my Canon 6D decided to go with based on a small disk of light against a large black background, I wouldn’t consider either of these to be objective truths on color rendition.

In addition to loss of sharpness using the TC, I found it really difficult to focus the lens on the sun, especially with the TO film. The decreased amount of light means Live View is using a much higher ISO, so the image is just boiling with noise in 10x viewfinder crop mode, and coupling that with the 2x2 or 3x3 (?) pixel binning that occurs in Live View on this camera, it’s more of a guessing game than anything else. The backlash in the focusing mechanism makes me skeptical that using the scale reading will be a reliable means of getting focus for solar imaging.

In conclusion, I’ll probably use the Baader film for imaging because of the more neutral color rendition and better exposure flexibility, but the Thousand Oaks may go on a spotting scope or something for visual observation, e.g., during an eclipse. I think the orange disk of the sun through the TO looks quite nice, from a purely aesthetic standpoint.
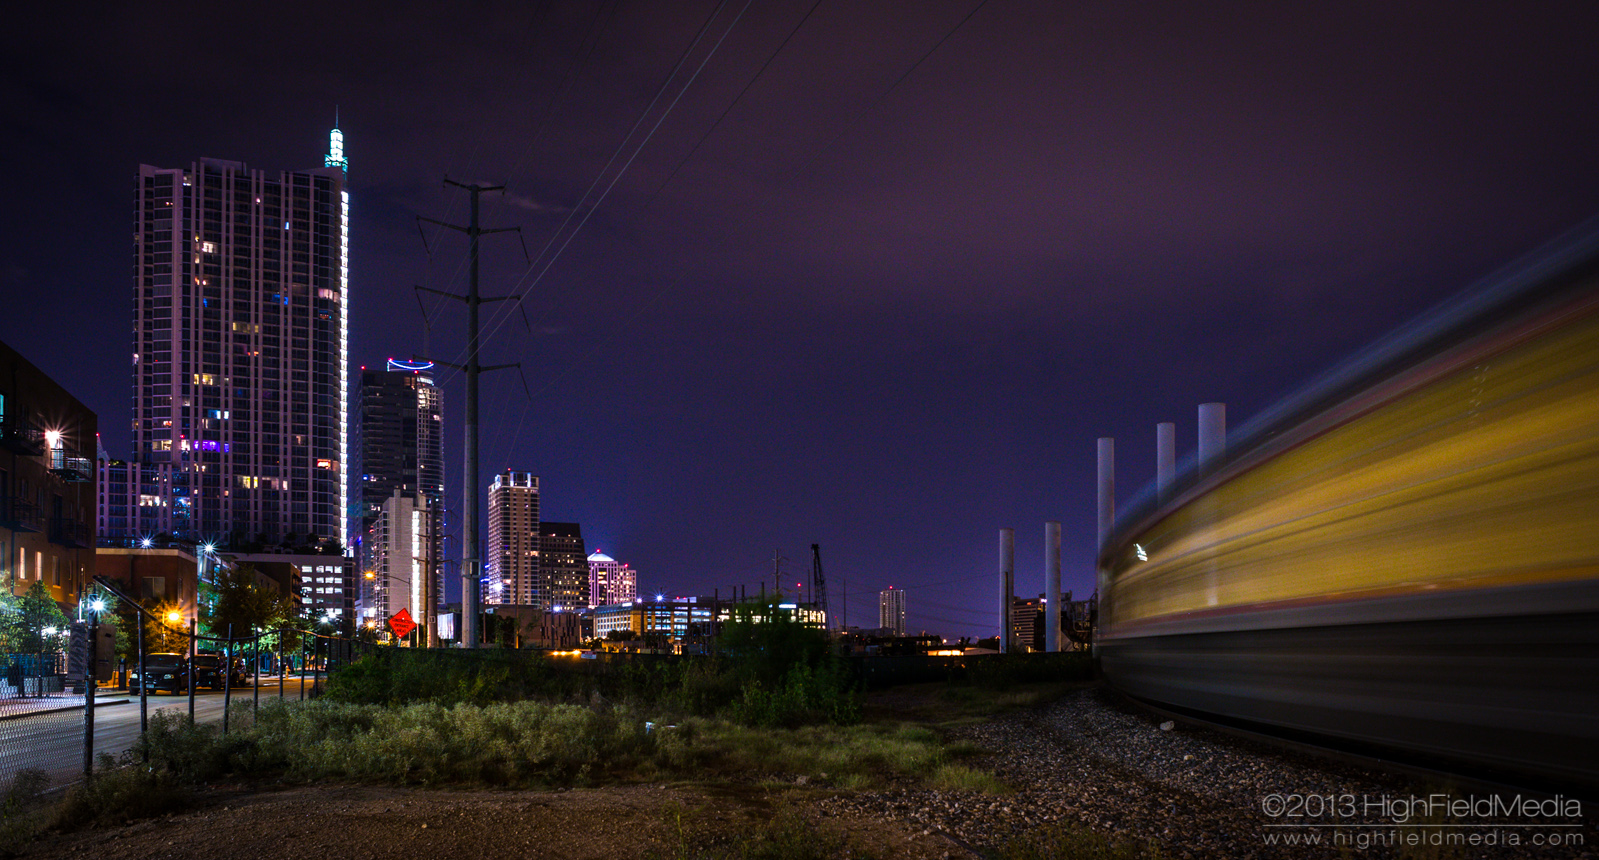
Lost in Space: Double Sighting of a Derelict Spacecraft

On the night of May 23rd, I was on a job down in a friendly south Texas town called Cuero. It was a hazy night, with high-altitude fast-moving cirrus clouds coming and going every 20-30 minutes. Not particularly ideal conditions for astrophotography, but excellent for showing off the interesting light patterns that a small town casts off. Unlike a big city, the light pollution of a small town comes from very concentrated sources, and each of them is often monochromatic. For instance, an oil services depot in the countryside may use sodium vapor lamps, while the city itself may use mercury vapor lamps. Various farming and oil operations across the landscape all use different lighting sources, which makes for a beautiful array of colors in a long exposure.

I spent 30-40 minutes filming a few short scenes from an overlook south of town (a popular spot among the locals). Being pretty busy with other projects and processing cityscape scenes of Cuero, I didn't actually have time to review this footage until last night. What I discovered was at first a curiosity to me as a photographer, but turned into something I would find fascinating as an aerospace engineer.

Early in one of my first image sequences there was a 5 frame series of streaks in the sky, all seemingly connected. Sure enough, the streaks lined up perfectly, and after stacking the frames in Photoshop and doing a little minor touching-up, I was rewarded with the following image:

If one looks closely at the top-center of the image, the two streaks can be seen. A detail shot is shown below:

Once I realized this wasn't an aircraft, I knew it was most likely an orbiting object, and even more interesting was that this orbiting object had apparently flared twice in a single pass.

(Aside: A satellite flare is a highly specular reflection of the sun off of solar panels or other glossy surfaces on an orbiting spacecraft. The spacecraft must have a very special alignment to direct the rays of the sun to an observer on the dark side of the Earth, so seeing one flare, let alone two distinct flares in a row is quite rare.)

The aerospace engineer in me took over and I set about doing some back-of-the-envelope orbit determination to be sure I was looking at a satellite. I looked up the nearby stars on my trusty star chart and estimated the observed angular distance traveled during the 50 second flare interval. I then applied some trigonometry and the definition of mean motion, and I was able to ascertain that the body was indeed moving at the correct angular rate to be in low-Earth orbit. Just by observing the direction the flares pointed in, I knew it was a highly inclined orbit also. My coarse calculations alone didn't help me identify the specific object, but they at least confirmed that what I had captured could most likely be attributed to an orbiting body.

Exactly identifying the body by continuing in this manner seemed daunting . At best, my calculations would perhaps narrow the list of potential objects down to a few hundred. I knew estimating the other orbital elements based on my crude observations would be difficult to impossible. To make matters worse, the internal clock on my camera was significantly off (and had since been corrected), so the image timestamps were useless for finding any absolute timing information. I quickly realized this could turn into a rather laborious exercise of parsing and sorting Space Track data.

Fortunately, I remembered that my favorite planetarium software, Stellarium, was bundled with a plugin that seamlessly pulls two-line elements from Celestrak to display satellites passing overhead. I knew approximately when I was out shooting that night (based on when I sent some text messages as I was packing up), and sure enough, I was able to quickly find a spacecraft that exactly fit the observed trajectory:

What I had captured was the Advanced Land Observation Satellite (ALOS), otherwise known as Daichi. ALOS is a Japanese Earth-observing satellite that was launched in 2006. At 4,000kg, ALOS is a fairly large vehicle (hence the name -- Daichi can be roughly translated from Japanese as "big"). Here's what ALOS looks like:

Advanced Land Observation Satellite. (C) Japan Aerospace Exploration Agency (JAXA)

Advanced Land Observation Satellite. (C) Japan Aerospace Exploration Agency (JAXA)

In 2011, after only five years, the ALOS mission was cut short by an unknown technical fault. It has been speculated that the vehicle sustained damage from a meteoroid impact causing the spacecraft to enter a power saving mode and become unresponsive. Despite this, ALOS is considered to be a success in that it exceeded its three year design life and collected a vast amount of high resolution imagery of the earth. This imagery is being used to construct a high-resolution global digital map which will have broad applications in mapping, natural disaster damage analysis, and water resource research [link].

ALOS has been derelict in a 700km altitude sun-synchronous orbit for the past 5 years. With no active attitude control systems, the vehicle is undoubtedly in a tumbling state, which increases the possibility for multiple flares as I was able to observe two weeks ago. At such a high altitude, ALOS will likely be in orbit for decades (or more) to come.

In yet another amazing coincidence, the successor to ALOS, ALOS-2, aka Daichi-2 was launched by JAXA at almost the SAME TIME I photographed ALOS (May 24th, 2014 at 03:05 UTC, or May 23rd, 2014 at 10:05PM CST)!

ALOS-2 also has an Earth-observing mission, but, unlike ALOS, has no optical cameras, and relies solely on radar for its imaging duties.

This wound up being a long post, but it's not often that I get a direct connection between my photography work and my aerospace engineering background. This string of coincidences was quite a treat!

Spring Is Finally Here

The grass is green, the flowers are in bloom, and the clouds are neatly distributed across the sky. Fluffy, yet well defined. Not all spring days look like this, but in my mind, they should.

This shot was taken last Friday at the Texas State Capitol.

Selections From the Backlog

Having not posted in over a month, I've accumulated quite a few still frames in my backlog that I wanted to share. I've also got a few incomplete blog posts waiting on me to process and scan a batch of B&W film when I get the time.

I spent an evening a few weeks back testing out some in-car camera mounting techniques, giving me a chance to pay homage to one of my favorite scenes in Koyaanisqatsi. I was pretty happy with the results, and I was glad I could figure out such a solid mounting solution. Previous attempts nearly a year ago had been plagued by camera vibration.

Last week I stopped off at Zilker Park after a day of shooting hyperlapse footage. The view from the Great Lawn is always nice, especially after sunset. I highly recommend checking it out on a warm night if you feel like just sitting around with some friends in the dark and having a few drinks. The view of the skyline is excellent, and there's a quiet contemplative feeling to the whole place.

The hours and minutes before and after a big storm can yield some spectacular and dramatic views, creating a powerful backdrop for the skyline of any city. This first shot was taken from Castle Hill right after a huge rain/hailstorm rolled through town at the end of March.

Getting out there in the right place before (as opposed to after) a storm is the tough part. Enabling the desired image composition for an incoming storm largely comes down to luck because the weather forecast is typically useless when it comes to small scale local phenomena.

Today I had a bit of a lucky break. I saw what looked like the beginnings of some awesome undulatus (wavy base) clouds forming overhead as I was on my way home (iPhone shot at right) and decided to immediately head out to the side of the freeway to try to shoot some footage of the clouds with a wide, unobstructed view. By the time I got there, all the undulatus-like formations had dissipated or moved on; instead, I was treated to quite a show from the backlit cumulonimbus clouds of an approaching thunderstorm. This storm was particularly intense, with hail, extremely heavy rain, and high winds.

Finally, I'll leave you with the fruits of an attempt to take some cliche bluebonnet photos of my dog friend. As she was being completely uncooperative and constantly looking at traffic, I settled for taking a portrait of the Metrorail instead.

Print Shop and Site Facelift

After getting a few requests that compelled me to work out some technical issues, I finally got around to adding a Shop page where I can sell prints of some of the still photos I've posted. Taking me back to my days restoring my often-missed Datsun 240Z, I had a case of "while I'm at it" syndrome -- one thing led to another and I wound up spending all night overhauling the entire site interface!

I think I've worked out all the major bugs, but there are likely to be a one or two that will slip through the cracks. If you have any issues with the Shop page, please let me know via the Contact form on the About page.

In the meantime, here's a photo I shot two months ago of the Texas State Capitol on a night of below freezing temperatures. I realized I'd posted this to Reddit at the time, but forgot to write a blog entry about it. The fog emanates from the massive HVAC system that heats and cools all the above- and underground facilities of the capitol complex. Usually it's invisible, but the low temperature that night caused the humid air to immediately condense into fog.

A print of this photo is available for purchase on the Shop page.

Congress Avenue, Abandoned

I stepped outside early this morning and saw that low well-defined clouds were rolling over town, their features illuminated by the city lights below. I decided it would be a good time to test out a new skyline shooting location I'd discovered, but not before feeling the need to clean the low pass filter on my camera sensor and get rid of a dust bunny that popped up in the middle of my last shoot.

This otherwise mundane camera maintenance task gave me a chance to try out a new item I picked up last week, the Pentax Image Sensor Cleaning Kit, O-ICK1. To start off, let's just say it turned out to be a bit of a disappointment. After seeing a recent F-Stoppers review of an identical product sold under a different brand (and not yet available through that vendor), I was sold on the idea of this potentially easier dry cleaning method. This little rubber-cube-on-a-stick didn't work nearly as well for me as it did for the F-Stopper reviewer. There were a great deal of dust specks that showed up clearly at f/32 that I could not remove with the Pentax tool, no matter how many times I blotted it back and forth between the low pass filter and the little sticky sheet. Before I began my cleaning attempt, I managed to somehow blow an oily speck of some sort onto the filter with my rocket blower, and the Pentax tool did nothing to lessen its appearance. After messing with it for a few minutes with only marginal results, I got out my bottle of Eclipse and a sensor swab and did my usual wet cleaning routine. Two swipes and the sensor was almost perfectly clean, and it got that difficult oily speck on the first pass. I suppose I'll keep it around for later attempts -- maybe it works better on some types of dust than others (like pollen), but it's definitely no replacement for a good wet cleaning.

Anyway, back to my little photo trip -- as I was making my drive across town I noticed the clouds had become very diffuse in the 15 minutes I spent on my 3:30AM sensor cleaning misadventure. I decided to check out the shooting location anyway, and snapped a few unimpressive test shots before heading home. On the way, I was amazed at the total lack of activity downtown, specifically on Congress Avenue. I had done a lot of downtown night shooting before, but never on Congress at 4AM, a time at which there were no buses, and the only traffic appeared to be a few early morning delivery trucks.

I managed to snap a few shots I thought were interesting, mainly because I could stand in the middle of one of Austin's busiest streets without fear, giving me a perspective I'd been unable to shoot from before.

Prints of both photos are available for purchase on the Shop page.

Monday Evening Stroll

I was out for a walk last night with my trusty sidekick, Bella, when I observed clouds starting to form above the Colorado River just west of town. Feeling a gentle breeze out of the west, it was clear that these conditions would make for an amazing sunset. I ran home and grabbed my camera and rushed over to one of my favorite spots on the east side just in time to catch a few nice shots in the last moments of the day.

I love the silhouette of the Austin skyline; I'm excited to see how it will look in another 10 years.