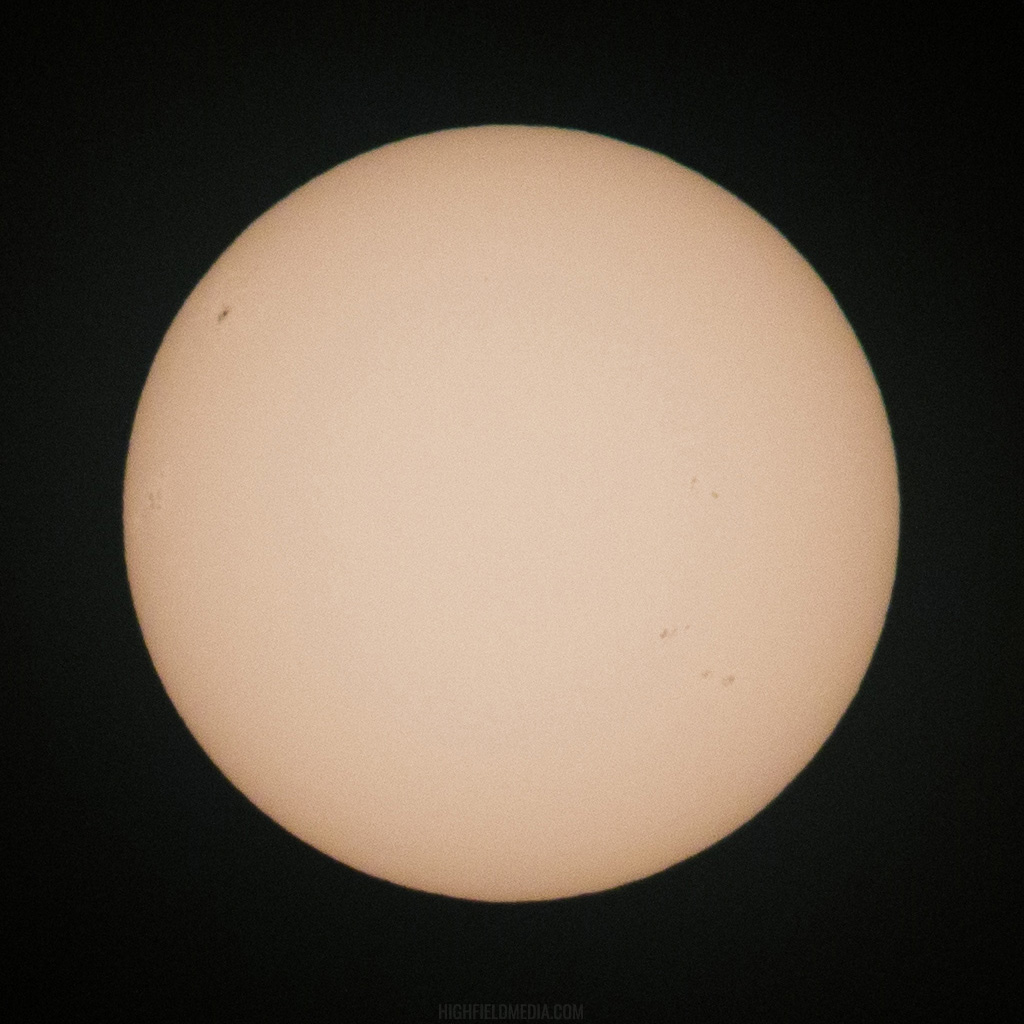
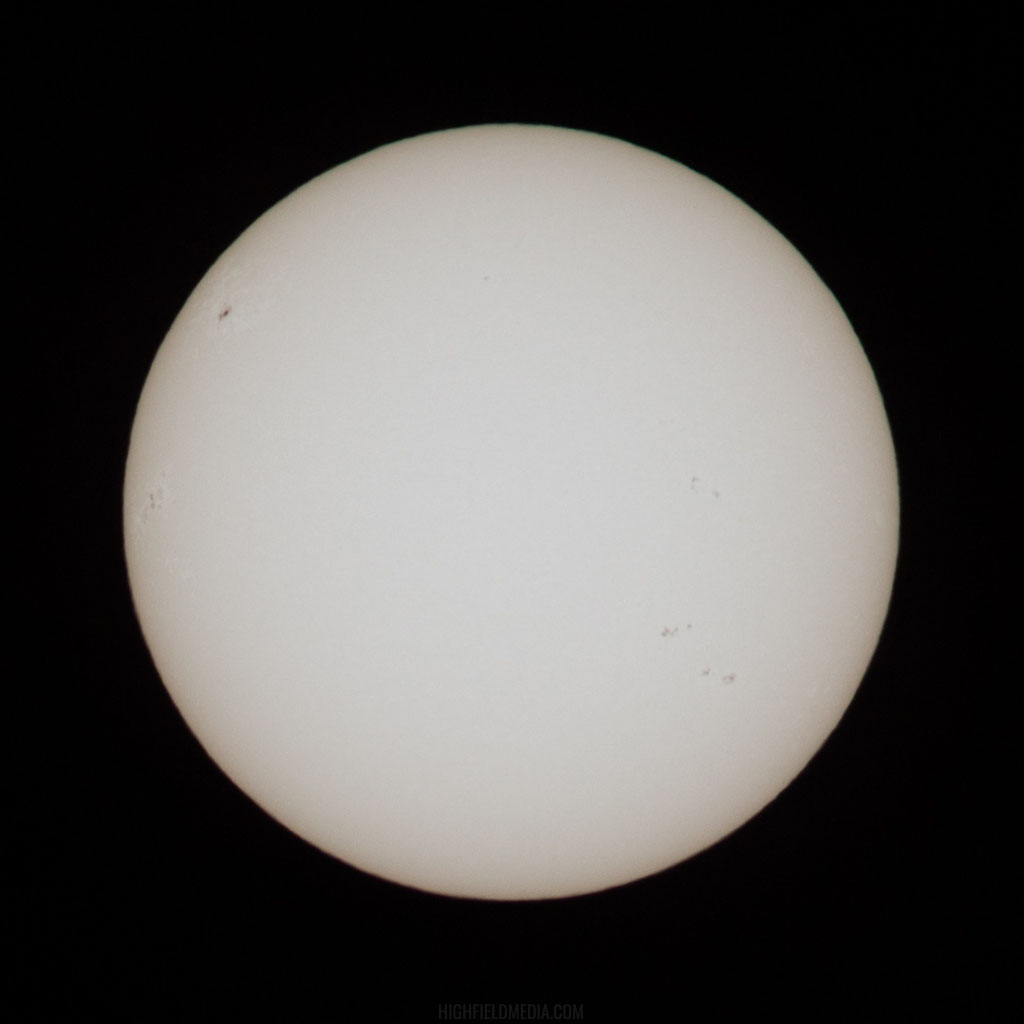
With all the buzz about the eclipse going on I thought about revisiting the topic of solar filters. I’d previously imaged the sun very precariously using regular ND filters (10-stop, or stacked 10-stop + 6-stop) but this is inadvisable as they’re not rated for this use. I did this by shielding the entire aperture with a piece of cardboard between photos and manually jerking it out of the way just in time for each photo (based on my intervalometer’s pre-photo beeps). This was years ago and near as I can tell there was no damage to my equipment but it was still a bad idea in hindsight. I was perhaps lucky; not all conditions and filters are the same, and damage to your focusing screen, sensor, and even eyes could result (it’s largely about the parts of the EM spectrum you can’t see).
Considering instead filters meant specifically for solar photography using a camera with a super-telephoto lens, you essentially have two options — screw-on glass solar filters, and solar filter film. I haven’t experimented with the former, this post is specifically about the latter.
Two common solar filter films I saw suggested on astronomy discussion forums are sold by Thousand Oaks (TO) and Baader Planetarium (BP) and I ended up doing a side-by-side comparison.
My first purchase was a 6x6” square of Thousand Oaks film on Amazon. The Amazon listing is a little ambiguous about which of their films you’re buying, I believe I received what they call their “Silver-Black Polymer Sheets.”
For comparison, I ordered (also on Amazon) the Baader Planetarium “AstroSolar Safety Film 5.0.”
As they’re intended for use on any aperture size, both of these products require you to construct your own filter holders. There are myriad instructions online for how to do this so I’ll omit providing any of my own here. I made holders for both films using Planters 10oz peanut cans with the bottoms removed, a hot glue gun, and a lot of tape. It turned out that with a little effort the inside of the Planters cans fit nicely around the extended hood of the Canon 400mm f/5.6L USM I picked up used (see previous post). I will say that the TO film is much more sturdy, I felt less nervous building the TO film filter holder vs. the BP, which felt like handling gold leaf by comparison.
Here’s a side by side comparison of solar images through the TO and BP filter materials (TO on the left, BP on the right):


The above photos are 1024x1024 full-resolution crops from a Canon 6D using the Canon 400mm f/5.6L USM with a Canon 1.4x teleconverter (original version, quite old). In each the sun was about half-way between center and the top of the frame (the sun moves quite fast when you’re futzing around with settings at 560mm equivalent focal length). I also rotated the BP image to align with the TO image, as the sun’s movement between filter swaps resulted in a small line-of-sight rotation relative to my pan/tilt mount (this reduces the BP image sharpness slightly).
The teleconverter undoubtedly reduces the sharpness some also, and I’m not sure if there’s a clear difference in terms of optical clarity between the two filter materials. However, the BP filter lets through way more light, so the ISO ends up being lower, hence the much higher relative amount of noise in the TO image, and better definition of the sunspot detail using the BP film. My initial interest in the BP film was after seeing a blog post somewhere else that compared the two films and showed a much sharper image with the BP film. In hindsight, I suspect that poster may have had the same challenge I did — difficulty focusing through high-ISO noise on Live View. I may have better luck running the camera tethered and using the EOS app to adjust focus, I’m not currently set up for that though, so TBD I guess. In-camera settings for each, to give you an idea about the difference in light transmission:
TO: f/8.0, 1/800s, ISO1600
BP: f/8.0, 1/1600s, ISO100
Doing the math (and excluding my LR adjustments), there’s about a 5-stop difference which is more than I would have expected. Also, the TO filter (as advertised) produced a really strong orange tint, which is maybe what you expect thinking about the sun as a cartoonish yellow orb in the sky, whereas the BP provided a nearly perfectly white image of the sun. I used the white balance eyedropper in Lightroom to bring the TO closer to white, for the side-by-side comparison, but I made no additional effort to match the white balance.
I’ve included a gallery at the bottom of this post showing the “As-Shot” and edited Lightroom settings I used for each. I didn’t think too hard about this for the editing, just played around to get some extra contrast in the sunspots. Note that some of the LR screenshots shows f/5.6; this is because I have several of the pins taped off in the teleconverter so I can still use autofocus with this slow lens. I’m shooting wide-open through the teleconverter which gives me an f/8 equivalent aperture for both photos. Also keep in mind that the “As Shot” white balance values are just what my Canon 6D decided to go with based on a small disk of light against a large black background, I wouldn’t consider either of these to be objective truths on color rendition.
In addition to loss of sharpness using the TC, I found it really difficult to focus the lens on the sun, especially with the TO film. The decreased amount of light means Live View is using a much higher ISO, so the image is just boiling with noise in 10x viewfinder crop mode, and coupling that with the 2x2 or 3x3 (?) pixel binning that occurs in Live View on this camera, it’s more of a guessing game than anything else. The backlash in the focusing mechanism makes me skeptical that using the scale reading will be a reliable means of getting focus for solar imaging.
In conclusion, I’ll probably use the Baader film for imaging because of the more neutral color rendition and better exposure flexibility, but the Thousand Oaks may go on a spotting scope or something for visual observation, e.g., during an eclipse. I think the orange disk of the sun through the TO looks quite nice, from a purely aesthetic standpoint.


