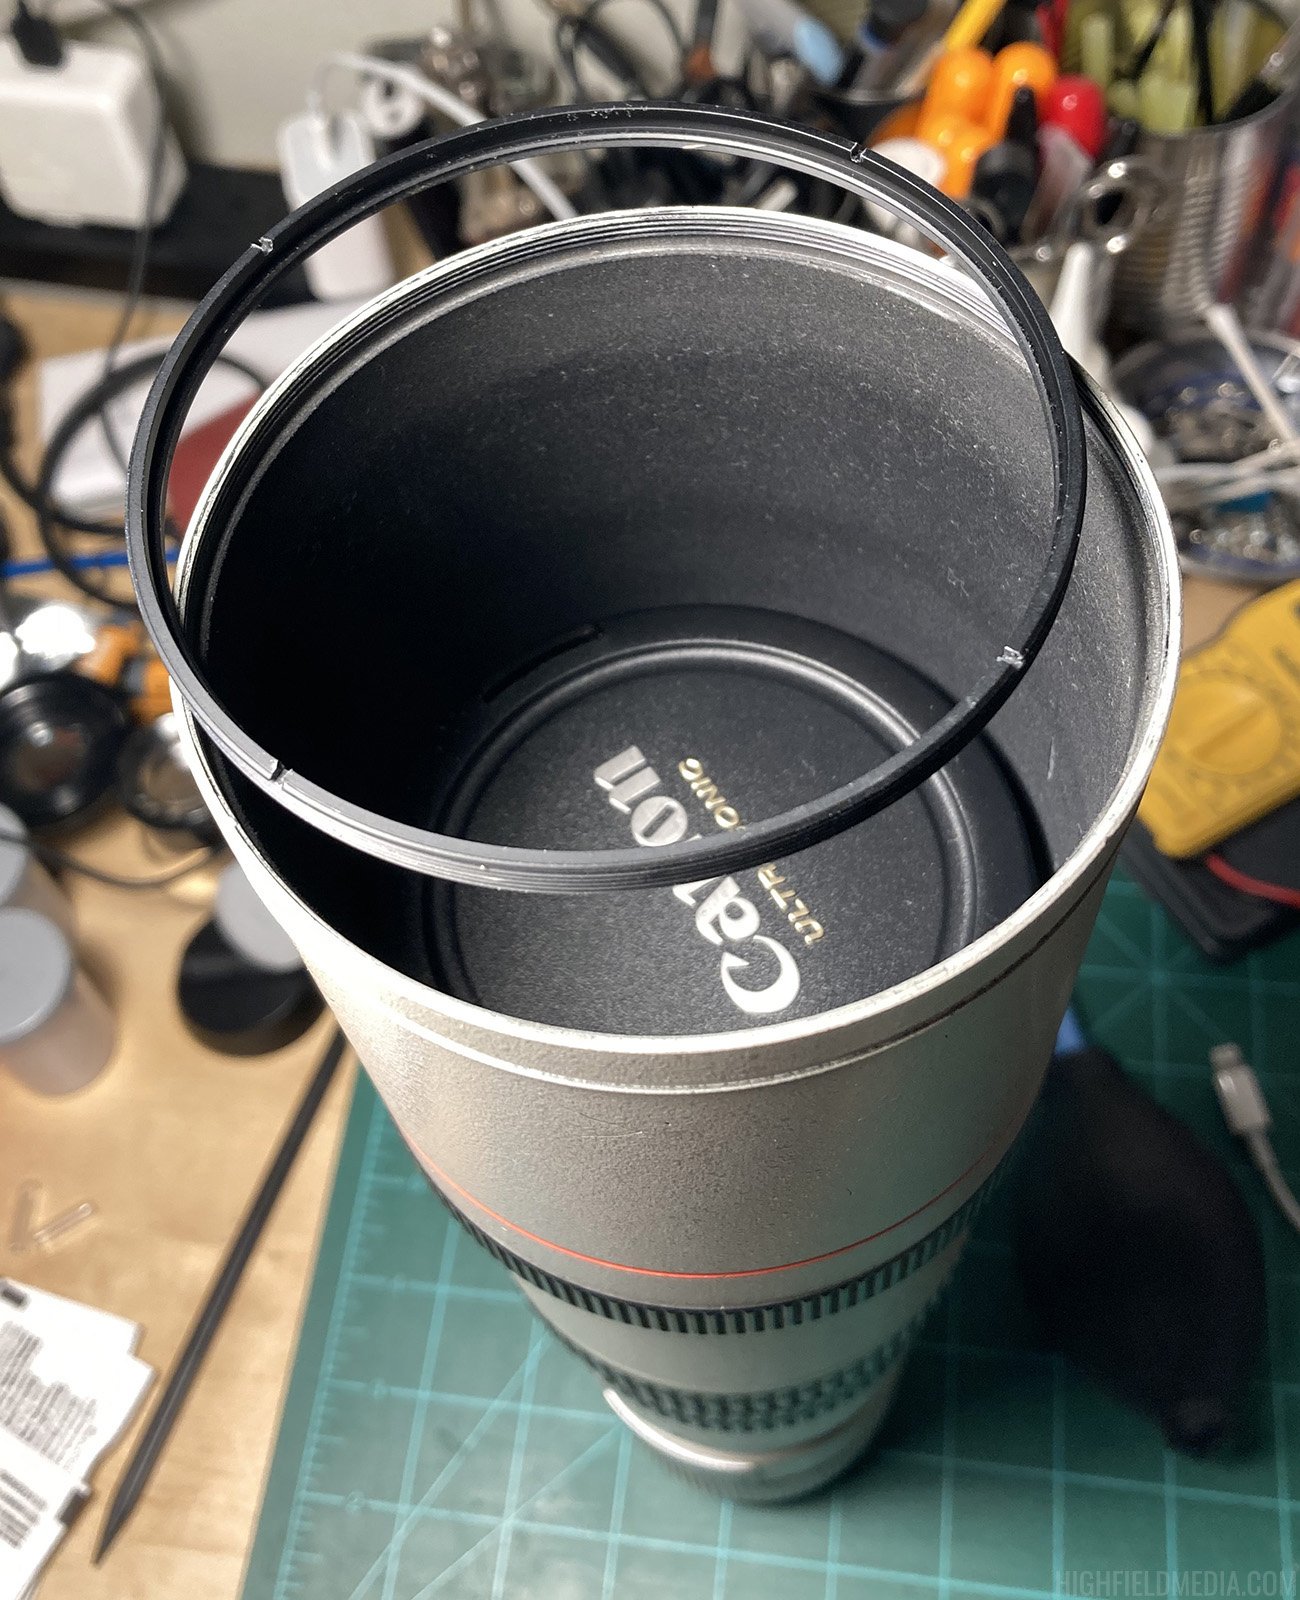
My new-to-me used Canon 400mm f/5.6L USM lens has been core to the past few posts, I figured I should close the loop on some comments on the very first post about planespotting. In that post I commented about how I wasn’t sure if I wanted to keep it because of the rough shape it was in. While the optics, aperture, and focusing mechanism all worked fine, the exterior was beat to hell and the hood was always loose unless screwed into the extended position. The exterior being scratched up doesn’t bother me so much, just gives it some character I guess. The loose hood was just unacceptable, though. I did a little reading online and found some comments hinting on the hood being easy to remove so I figured I would roll the dice and give it a shot, maybe the repair would be as easy as I imagined (it was).
If you’ve somehow found your way here and are having the same issue, here are some tools and parts you’ll need:
Adhesive-backed felt:
I used some from Hobby Lobby I’d had on a shelf for years, see photos below. It’s not really “felt” per se, but a synthetic felt-like craft product. Mine is a generic brand called Treehouse Studio and lists a website (craftsetc dot com), which as I write this appears to be defunct.
Thickness is a critical factor here, and unfortunately not marked on the package. For what it’s worth, I used a dial caliper and compressed a sample of felt (with backing paper in place) as much as possible and it went down to 0.020” and on release it sprang back to 0.032”. If yours does likewise it’s probably close enough.
Plastic spudger:
The kind of little non-marring mini-prybar you get with a phone battery replacement kit or similar.
Optional but recommended, I only really used it to remove the rubber gasket on the end of the hood. If your lens is as old as mine this rubber may be a little fragile , no use taking a risk using a screwdriver or something. I obviously didn’t care about scratching my paint but that may matter to you.
Lens spanner wrench:
This is a specialty tool for working on lenses, it lets you manipulate the large ring fasteners on lenses using the notches or holes left for this purpose. Get one that has tips for both notches and holes, you’ll need the blade tips for notches for this job but you’ll see the holes on a lot of misc. photography gear. I think mine was like $15 on Amazon, it was one of those random 6 letter brands Amazon is full of for trademark reasons.
Optional? Some say that, but I disagree, I couldn’t imagine trying to remove the ring at the end of the hood with a kitchen knife or something similarly clumsy, it took quite a lot of force to get it going.
Q-tips and alcohol:
I used these to try to remove as much of the old remaining felt as possible. The glue Canon used does not dissolve with alcohol, but I think it did help break free a lot of the fibers. Use stronger solvents at your own risk, I guess.
Step 1:
Put on a lens cap to protect the front element, extend the hood, screw it into place to secure it. Next, take your spudger and get under the outside of the rubber gasket on the end of the hood. It shouldn’t take much persuasion to get it moving. Here’s a phony picture I took after I’d already removed it and decided I should document the process:
Step 2:
Using your spanner wrench, unscrew the ring at the front of the hood. This ring is the only thing that keeps you from sliding the hood downward toward the lens mount. It may take quite a lot of force to unscrew so be careful and hold onto the hood as you unscrew, not the lens. It’s really easy for the tips of the blades to slip out and damage the ring if you get careless. But don’t worry too much, remember that it’s going to be covered up by that rubber gasket anyway. I think either my ring or the hood was slightly out-of-round, so there were parts of each revolution that got harder/easier. Here are two more phony disassembly pictures I took after I’d already removed the ring. Please excuse the embarrassing mess in the background, as is typical for me I have like 5 projects going at the same time.
Step 3:
Remove the tripod mount ring at the middle of the lens body (if you haven’t already), then you should be able to unlock the hood and slip it down off the rear of the lens body. Check out the coarse threads on the exterior of the lens body, this is what lets the hood lock into position when you push it forward and twist. A previous owner went too crazy on this thing regularly, pretty obvious from the severe wear on the threads. Still works, at least. Be careful of the dull gray ring just above the threads, it’s a square-profile O-ring and it’s what you’re screwing the hood against when extending it. I read about people getting that thing twisted up in the lock threads and having a real bad time, I would guess this is more likely to happen if you tighten it forward too hard regularly and deform the square profile.
Step 4:
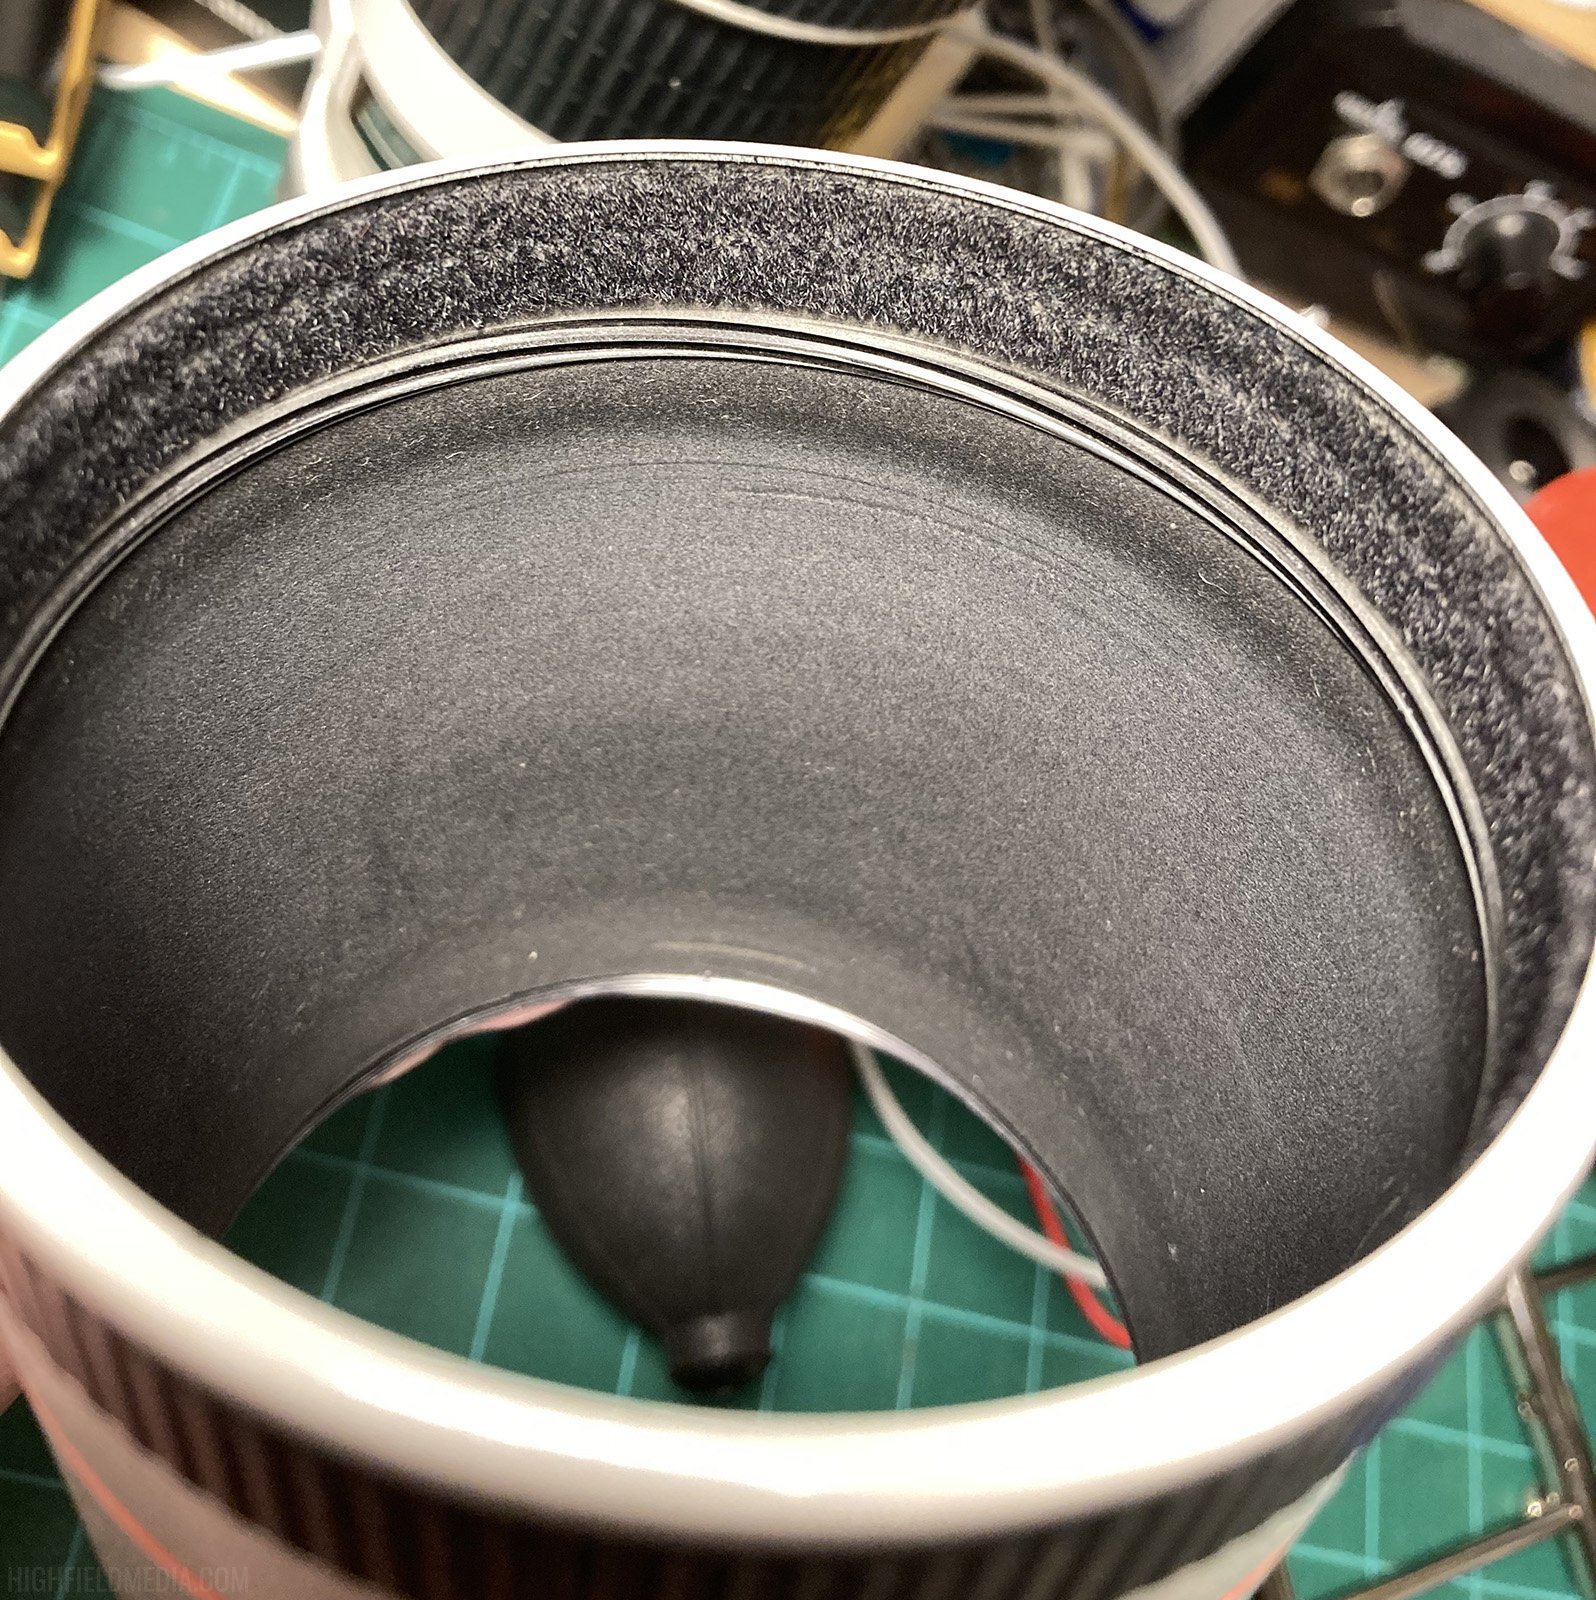
With the hood removed, check the felt behind the lock threads. I think it’s not actually “felt,” it’s synthetic and reminds me more of a cut-pile carpet, where small fibers were attached at the base and their dense packing (when new) provided the cushioning and friction the designers intended. I’m going to just keep calling it “felt" for simplicity.
You can see in the left photo below that mine is pretty sparse, which is why it was flopping around loose on the lens body when unlocked. I spent some time while watching TV just mindlessly scrubbing away at the felt with some alcohol-moistened Q-tips, you don’t have to get it all, just remove as much of the old stuff as you can. As far as I could tell, alcohol does not dissolve the glue but seemed to help free some of the fibers somehow. There’s probably a stronger solvent that would work better, but try that at your own risk I guess. Be careful while doing this that you keep the alcohol from going past the locking threads, there’s a different kind of felt in the main body of the hood that’s only there to reduce reflection and you definitely want to leave that alone. I have no idea if alcohol would damage it. The right photo below is what the felt looked like when my TV show ended and I decided “good enough.”
Step 5:
Measure some new felt, cut, and apply with firm pressure over the old glue/felt, being careful to keep it from getting into the threads or sticking past the bottom lip of the hood. I used a piece of scrap leftover from an earlier project, but here’s a photo of the generic packaging. My suggestion would be to cut it longer than you need, then snip the last bit off as you’re fitting it so you can avoid a little gap like mine. Also, I would err on the side of making the strip a little narrower than you think it should be, you really do not want this stuff getting jammed up in the threads.
Step 6:
As with any set of instructions where the author gets tired and lazy by the end, reassembly is the reverse of disassembly. See the last photo above where I summarize the entire reassembly procedure by showing you the rubber end gasket going back on.
If your felt is the right thickness and you applied it well enough, you should be rewarded with a rather tight fitting lens hood, just like new (hell, I don’t know, I’ve never had a new lens like this).
Here’s a video of it in action. Probably hard to tell but it feels pretty good to me. A little too tight, if anything, but I figure it could loosen itself up over time as the felt gets used to its new home:
This was enough for me to decide to keep the lens. This cheap felt is surely not as good as the original but if this is just something I have to do every few years that is fine by me. The standard disclaimer applies; modify your lens at your own risk.


